Parts to build OpenAutoLab
Components to buy
Main board
- Arduino Nano
- Pololu DRV8874 or similar
- LM2575-5.0BT or similar (LM2576-5.0)
- 330uH 1A coil
- 100uF 16V capacitor
- 330uF 25V capacitor
- 2x SB140, or any other Schottky diodes, that survive short 2A burst from the motor
- 8x Phoenix PT 1,5/ 2-3.5 1x2 or similar P3.8 screw terminal blocks
- 4x Phoenix MKDS 3/ 2-5.08 1x2 or similar P5.08 screw terminal blocks
- 3x 6x6mm push switches
- 2x ULN2064 or similar darlington transistor arrays (ULN2065, TD62064APG)
- 2x SPDT ON-ON (or SPST) toggle switch, for example APEM 5026
- 3x1 right-angle pin header for connecting servo (or bend straight ones)
- 2x1 pin header for connecting fresh water pump switch
- 2x1 pin header for connecting main power switch
- 4x1 socket header for connecting the scale
- 4x1 socket header wire for connecting display
If the parts listed are unavailable, feel free to modify the PCB to fit the components you want to use instead.
Electromechanics
-
6x normally-closed 12V valves. They are somewhat tricky to buy, as they have no proper name. Try including "6.2mm" which is outer diameter of connecting piece into your search query. See the picture as a reference, try to find the valves that look the same. Number of valves depends on what process you want to run. 1 valve for water, 1 valve for waste, plus 1 valve for each chemical. 8 is the maximum number supported by the current board
-
ZC-A210 or similar 12V gear pump, capable of running in two directions at a speed of about 2l/min for prolonged times
-
Weight cell and HX711 ADC for it
-
MG90 servo
-
Brita filter for water
-
Any pump that can work for prolonged periods without overheating. See picture for reference, no part name just like with valves
-
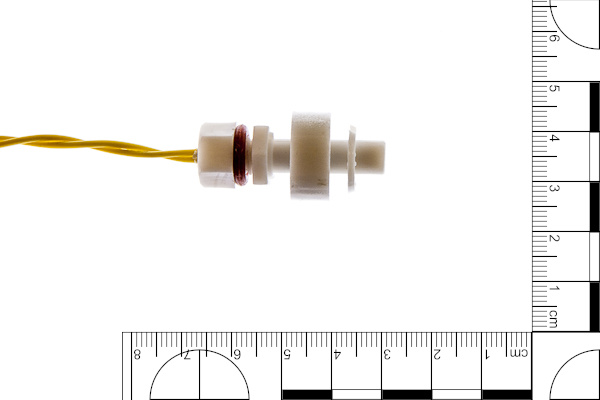
Float switch
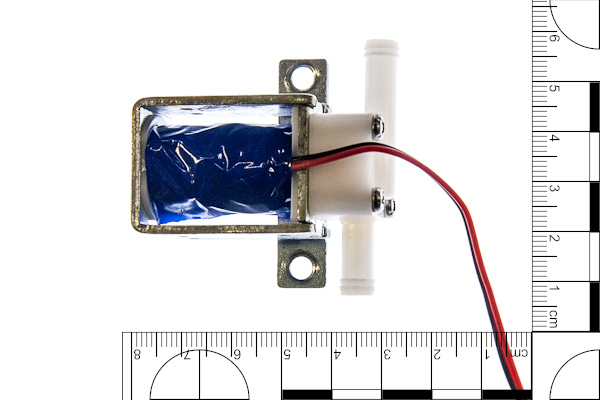
Solenoid valve
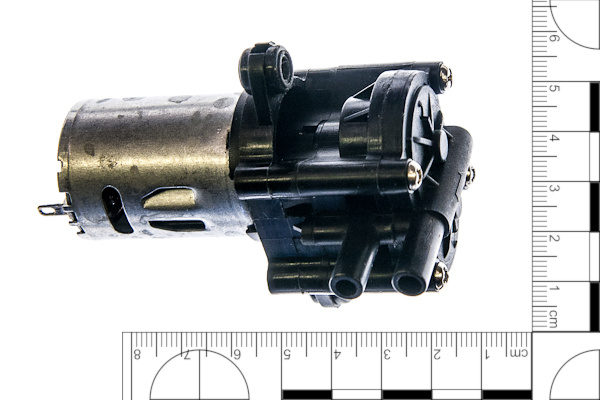
Bidirectional gear pump
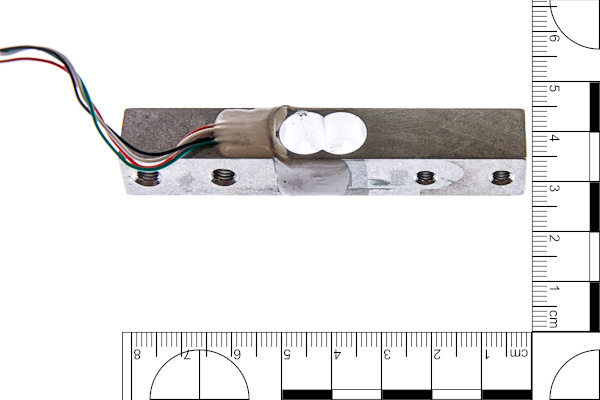
Weight cell
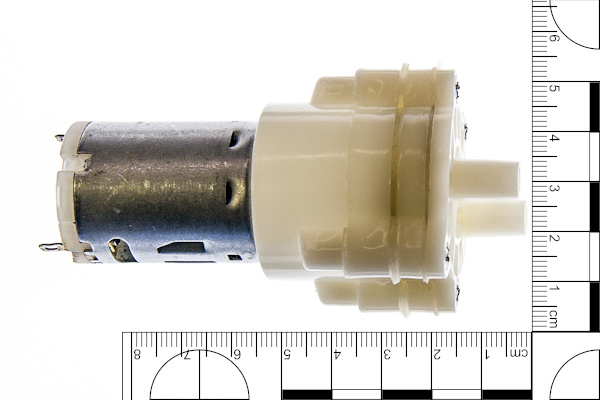
Membrane pump (clean water pump)
Float swich
Other parts to buy
- M8 threaded rod and nuts.
- Flexible silicone hose. 6mm ID 9mm OD is recommended.
- Silicon rubber rings. I suggest 8mm ID, same as thread diameter (mentioned later).
- 5x T-pipes, one for each valve minus one.
- Developing tank. AP developing tank is recommended.
- 4x Vessels for chemicals. I suggest STANDARDMÅTT from IKEA.
- 12x3mm cylindrical neodymium magnets.
- Borrow or buy M8 tap, a tap holder and M8 die for cutting threads. I wouldn't even try to make 3d-printed water-tight hose connections, tapping and threading are better be done by hand.
- 6x M8x8 plastic screws and 4mm drill as a more practical alternative to 3d-printed screws. More on that in lower_rail section.
- Sous Vide and a water-tight container for heating the vessels with water.
Parts to 3d-print
STL files for all mentioned parts can be generated using the parts/generate_stls.sh script in the repository.
They are also built automatically using GitHub Actions and uploaded as GitHub releases.
Find the latest openautolab-stl.zip here.
Stl-files are divided into several groups: agitation, enclosure, frame, lower_rail, and upper_rail.
Those groups correspond to modules which are described in different chapters.
Filenames follow 'group_part.stl' naming, where 'part' is the name used in building instructions often dropping the 'group' part.
Frame
The machine consists of an L-shaped frame, which holds two rails: the lower rail where the vessels and tank are mounted, and the upper rail, where the pumps, valves and electronics are mounted. 3d-printable parts are generated from frame.scad and can be customized to use different threaded rod diameter.
- 16x x-mount. Each pair of parts holds two rods together, two rods are mounted on each of two sides of each of two rails, therefore 16 parts in total.
- 4x t-mount. Each pair holds two rods at a right angle, the frame needs 2 such L-shaped structures to hold the rails.
- 4x small_bracket for mounting electronic enclosure on the upper rail.
Lower rail: vessel and tank interfaces and mounts
To connect the vessels and the developing tank to valves and the pump magnetic hose interfaces are used. To attach those interfaces to the lower rail magnetic holders are used. The interface for the tank has also a light-trap that prevents fogging the film through the hole, to which the hose is connected. Magnetic holder for the tank is mounted to the weight gauge for measuring the amount of fluid in it. All of those parts are generated from lower_rail.scad and can be customized to fit magnets of different size and force.
- 6x hollow_screw - to mount hose interface to vessels and tank through a hole.
- 5x interface - the interfaces for the vessels.
- interface_light_trap - larger interface with light trap for the developing tank.
- 6x interface_cover - mounts magnet to the interface.
- 6x hose_adapter and
- 6x hose_sleeve - to make hose fittings.
- 5x magnetic_holder - to attach vessels to the rail.
- magnetic_holder_wg - to attach developing tank to the weight gauge.
- 6x magnetic_holder_cover - to mount magnet to the holder.
- 2x weight_gauge_bracket - to mount weight gauge to the rail.
- 2x filter_support - too keep heavy filter from breaking the hollow screw.
Upper rail: mounts for valves, pumps and electronic box
The parts that do not have to be submerged into water when developing in heated bath are mounted on the upper rail. Main bidirectional pump, auxiliary pump for clean water, magnetic valves, enclosure with electronics, and optional battery holder are mounted with respective brackets tightened by M4 screws and nuts. Main pump and valves are connected together with silicon hose and T-pieces.
- 12x valve_bracket - each valve is supported by a pair of brackets.
- main_pump_bracket - consists of two parts in one stl to mount the main pump.
- filter_pump_type*_bracket - two parts in one stl to mount the filter pump, two kinds of pumps supported.
- 2x filter_attachment - to hold float sensor and input hose on the filtered.
Agitation
To agitate the chemicals inside the developing tank servo-powered rod should be attached to the top of the tank. Parts compatible with AP developing tank are provided. Parts compatible with other tanks should be designed individually for each one.
- agitation_rod - goes into developing tank just like the rod for manual agitation.
- agitation_cap - goes on top of the tank, holds the servo with the rod attached.
Enclosure
Main board is hidden in the enclosure, which is mounted onth the upper rail
- front - front side of the enclosure, here the screen is mounted and the buttons are put through.
- back - rear side of the enclosure, here the board and the switches are mounted.
- buttons - plastic rods, that push the switches on the board.
Optional tools
It can be hard to cut good threads in small hard plastic parts, to simplify this process, there are tapping and threading helping tools in the optinal folder. Four different tapping tools are there to keep the tap perpendicular to each of the four surfaces, where the threads need to be. Tapping tool holds the die coaxial to the hollow parts that need to be threaded. Wrench has two sides for holding hollow screws and hose adapters during threading. Nut spinner is small round wrench which makes it easier to put nuts on long threads. Servo gauge is a set of test holes to find out which one fits best to your servo.
Power supply
The machine is intended to use 12V power supply, since the rated voltage of pumps and valves is 12v. The internal DC-DC converter can take up to 40V. It's better to provide stable 12V input. That being said, I've used 4 cells of 18650 type without voltage stabilisation, which can give more than 16V fully charged, multiple times and the hardware is fine. The battery holder and battery enclosure to be bounted on the upper rail are kept as hidden features for now, available directly from .scad files. But use them on your own risk or stabilize the battery output before the machine.